


Print Notes #1
The technical is always informed by the philosophical.

Making the first print
Welcome to the first Print Notes. This will be a follow up to the main Negative Space post talking about how I made the print for that month. This will be more of the technical side of things, but the technical is always informed by the philosophical.
Learning the technical side of printing will be a never-ending journey, but knowing how to do the technical things will help you communicate the philosophical better. That’s what I hope to gain from this experience.
Darkroom printing is almost like making a whole new photograph. Although I have my negative, I still have to focus the image on the easel, pick the right exposure, and develop it. In this post, we will mainly be looking at the exposing aspect and also a couple of techniques called “dodging” and “burning”.
Picking Exposure
Exposure is determined by how much and how long. Meaning the amount of light and the amount of time that light is hitting the print. So the brighter the light and the longer the light hits the print, the darker the print will be. The lower the light and shorter the light hits, the brighter the print will be.
In order to determine the right amount and time of exposure, there are things called “test strips” that are made to test the different exposure aspects. In this case, I made a test strip of the whole print to see how the light would effect the overall image.
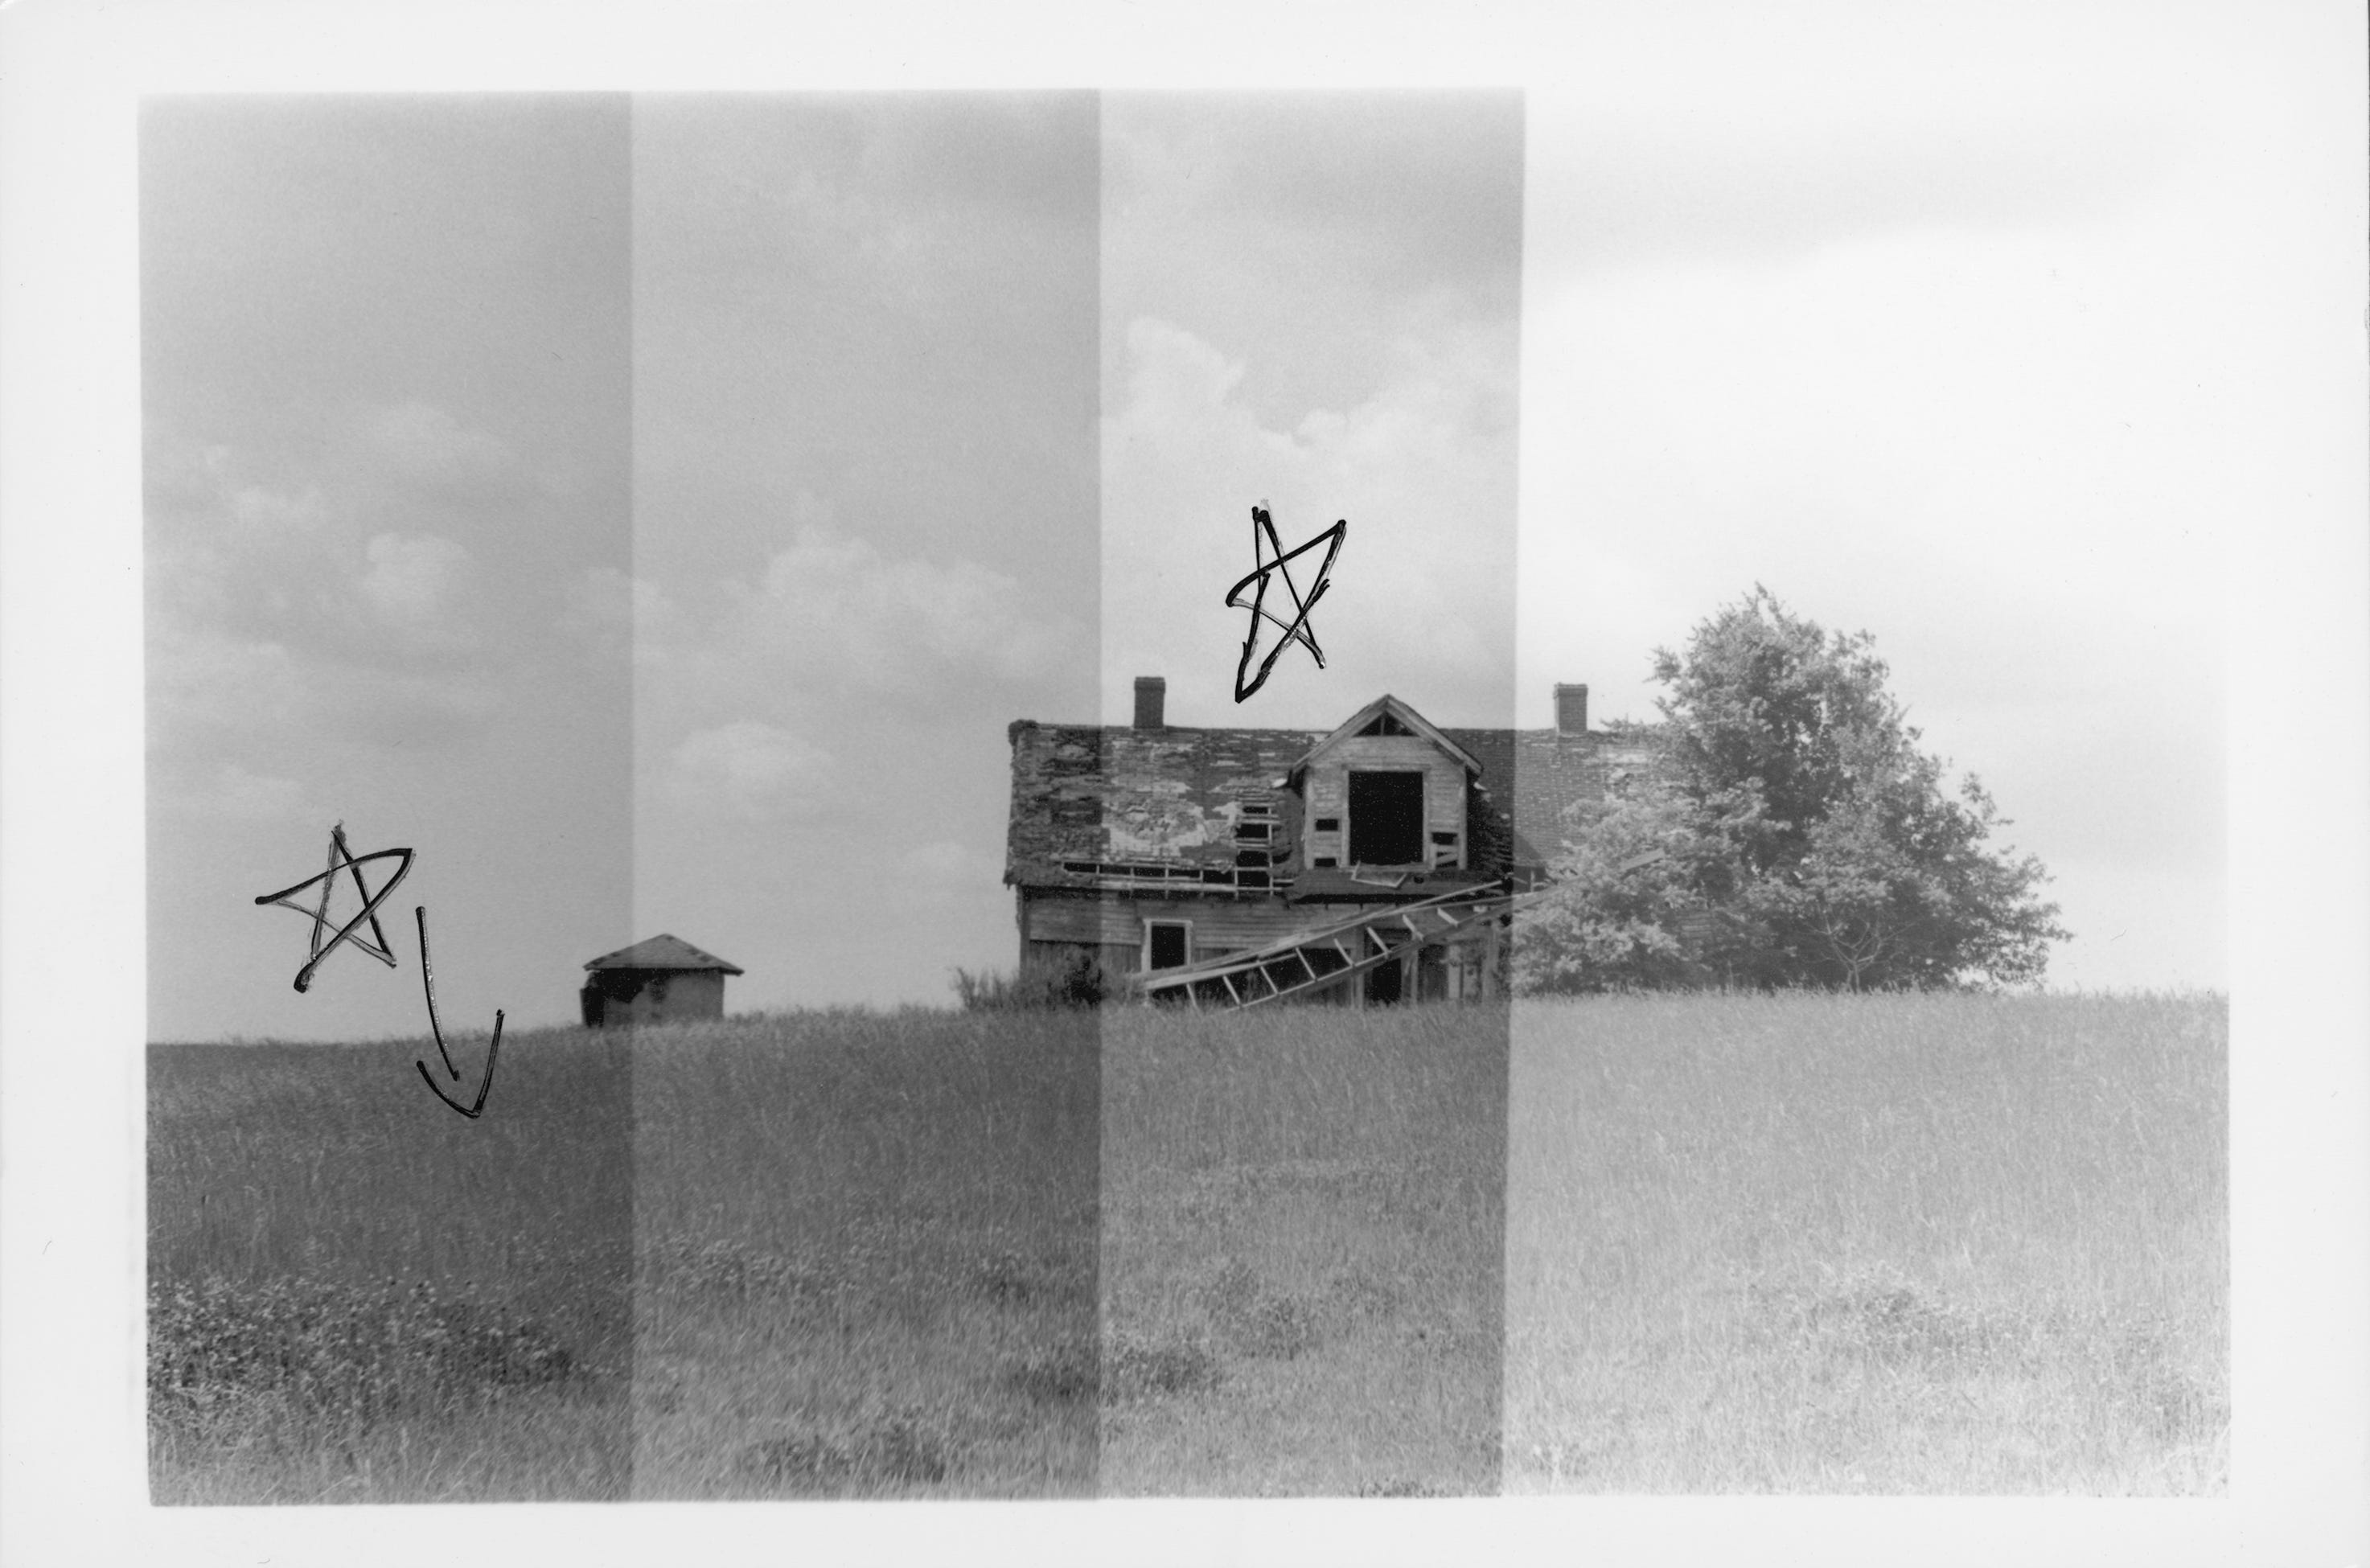
There are four different sections here, each exposed at different times. In this case, I went in increments of 5 seconds. So from left to right: 20 sec, 15 sec, 10 sec, and 5 sec. So this gives me a general understanding of what the print would look like anywhere in between 5 and 20 seconds.
There are different aspects of each of these exposures that I like, but it really comes down to which will serve the photo best. For the overall exposure of the photo I chose 10 seconds. I believe the house is best exposed to retain the contrast and details at 10 seconds. The grass, however, was a little too bright for my liking, but the 20 second exposure was closer to what I was looking for in that area.
So the question is, how do you expose the image at different times without compromising the details of the photo? There are a few different ways that this can be done, but I used a couple techniques called dodging and burning.
Dodge and Burn
Although this sounds like a dodge ball strategy, it’s actually used in the darkroom and can even find tools for this technique in Adobe Lightroom and Photoshop.
Simply put, dodging is when you cover a certain part of the image from the light while exposing the rest of the image, and burning is when you “burn in” or expose a certain part of the image longer than the rest. Here is a look at my notes after making a full test print of the image: